Cable ties are one of those components you never notice in an elevator — but they are almost always there. When we ride an elevator, all we see are buttons, a display screen, and a metal panel. What most people never see is what lies behind it: button signal wires, control wires, flat cables, terminals, and small circuit boards, all packed into a surprisingly tight space.
In these hidden areas, cable ties do a practical job. They are not core electrical components, and they cannot replace screws, clips, or dedicated fasteners. But for wire organization, cable routing, and long-term maintenance, they are a simple, low-cost, and dependable auxiliary tool.
How Crowded Is the Space Behind an Elevator Button Panel?
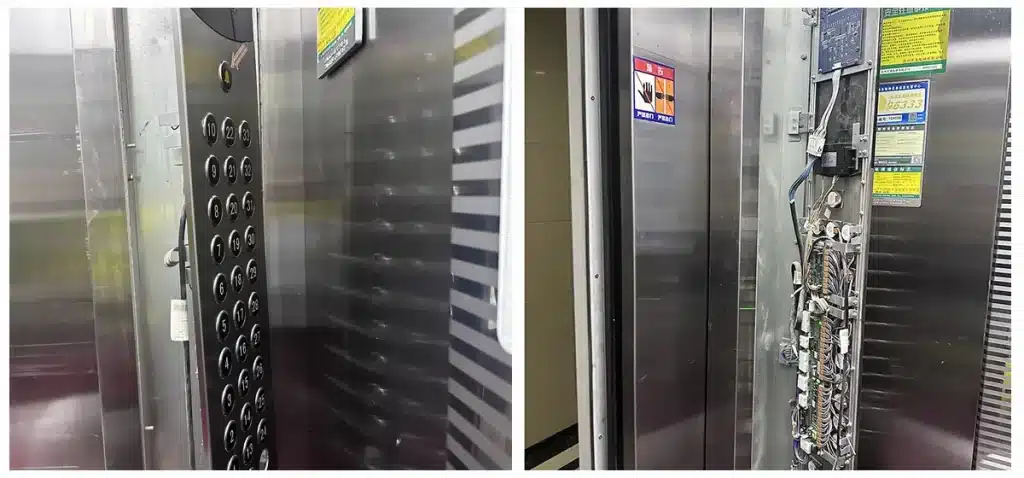
The real photos here show just how little room there is behind an elevator button panel. Circuit boards, terminal blocks, floor button signal wires, display module cables, and the main wiring harness connecting to the control cabinet are all concentrated in a limited area.
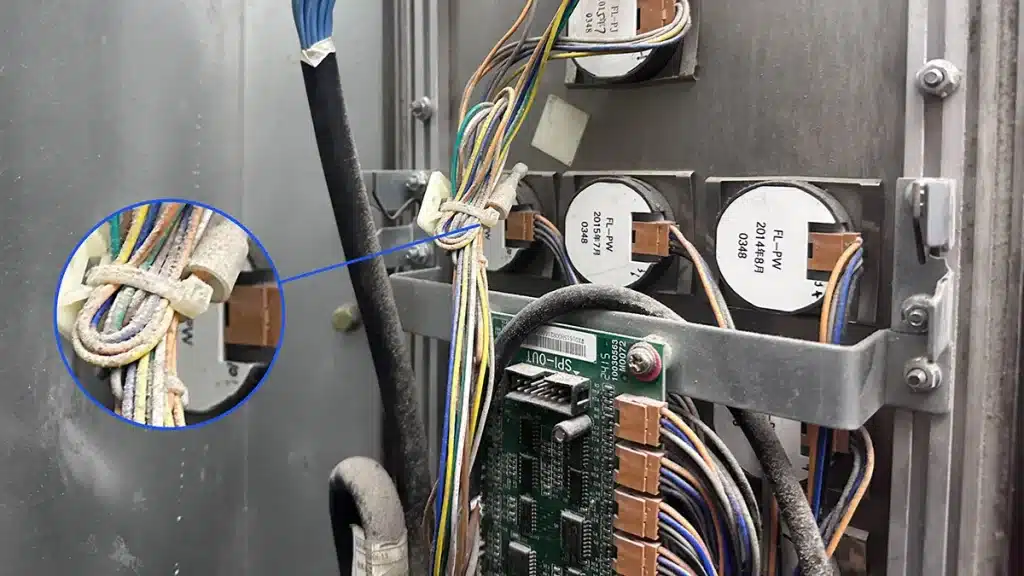
As the number of wires increases, the interior can quickly become difficult to manage — wires cross over each other, droop, and tangle. When that happens, a technician responding to a fault has to untangle the wiring before they can even start diagnosing the problem. In a space this dense, wire management is not an aesthetic consideration. It directly affects how efficiently the panel can be inspected and serviced.
Cable Tie Fixing for Small Wires and Vertical Cable Runs
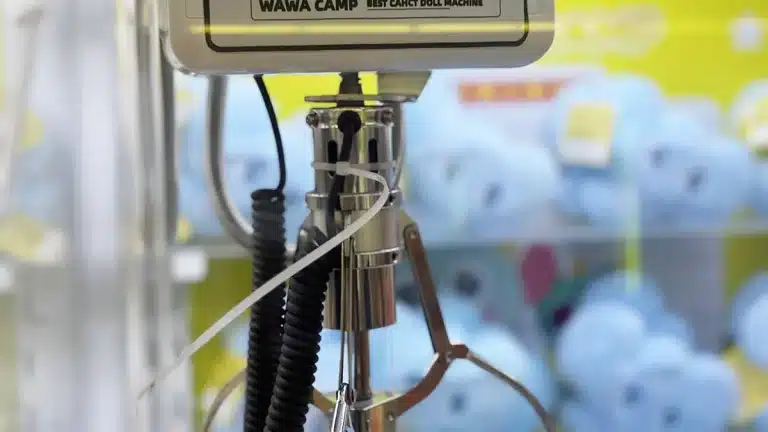
The photos show that signal wires behind elevator buttons are typically thin and closely arranged. These wires connect individual floor buttons and function modules. If left loose, they may be snagged accidentally when the panel is opened for inspection or reinstallation. This can lead to poor contact or even a broken connection. Grouping them with small cable ties helps keep the wires in position and prevents them from drifting into contact with nearby metal parts.
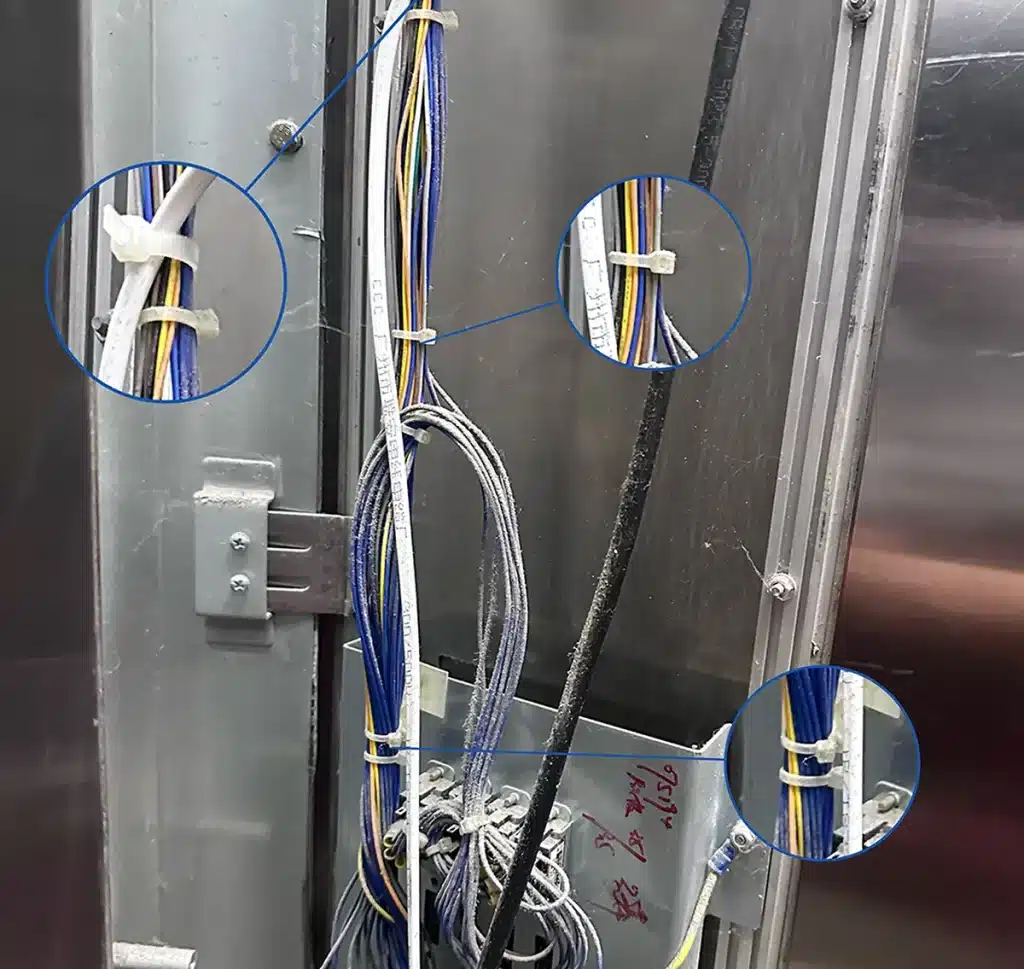
The vertical cable run along the side of the panel is another common situation. As the photos show, multiple wires of different colors are fixed at intervals with cable ties and routed downward along the panel’s internal structure toward the control cabinet. Over a longer run like this, an unsecured wire bundle may gradually sag under its own weight and rub against metal edges. Over time, this may damage the wire insulation.
For this type of wiring, small cable ties in the 2.5–3 mm width range are commonly used. They help keep the wires following a clear path without taking up much space. The appropriate fixing interval depends on the wire bundle size and installation space. The goal is to keep the bundle stable and prevent it from sagging between fixing points.
For very thin wires in compact spaces, standard one-piece cable ties are generally the more practical choice. Releasable cable ties are often larger and may not suit this scale of application as well.
Organized Wiring Makes Maintenance Faster
An elevator button panel is not sealed permanently after installation. Button replacements, wiring faults, and scheduled maintenance all require opening the panel — which is exactly how we were able to take these photos, during a routine wiring inspection.
When the wiring inside is unorganized, a technician has to spend time tracing cable paths before locating the fault. When wires are grouped by module and secured with cable ties, the layout is immediately readable. The right wire bundle is easy to identify, and the technician can get to the actual work faster. This is why many elevator manufacturers and installation teams treat wire organization as part of the installation standard, not just a preference for tidiness.
Practical Notes on Cable Tie Installation
A few details matter when using cable ties in this environment:
- Tightness: Do not overtighten, particularly around thin signal wires and flat cables. Excessive pressure restricts normal cable flex and can damage insulation over time.
- Tail trimming: After cutting, the tail of the cable tie should be trimmed flush. A sharp stub can scratch wire insulation or cut a technician’s hand during later maintenance.
- Avoid critical contact points: Cable ties should not press directly on terminals, connector interfaces, or flat cable bend points. Pressure at these locations can cause poor contact.
- Follow manufacturer requirements: All wire fixing methods should comply with the elevator manufacturer’s installation specifications. Cable ties are auxiliary tools for wire organization — they do not replace dedicated electrical fasteners or structural fixings.
Final Note
From these photos, it is clear that cable ties behind elevator button panels serve a straightforward purpose: keeping thin wires grouped, securing cable runs, and making the internal layout easier to read during maintenance. They are not the most prominent part of an elevator system, but they solve a real problem — one that matters every time a technician opens the panel.
The same logic applies to control cabinets, distribution boxes, and any other electrical equipment where wires need to be organized and held in place.